October 30, 2008

Happy Halloween!

Wishing you a Happy Halloween. Here's a little inspiration for all those pictures you plan on taking.


Supplies Used:
Prima Pattern Papers
Prima Felt Flourish
Prima Flowers
Prima Journaling
Prima Rub-ons
Supplies Used:
Scarry Card
Prima Little Boo Collection “Fiery Mansion” (860172)
Prima Little Boo Collection “Spooky” (860165)
Prima Little Boo Rub Ons (860226)
DMD Inc, Paper Reflections 5 x 7 Card (6 09636 01200 7)

Spooktacular Card
Prima Little Boo Collection “Haunted Mansion” (860189)
Prima Little Boo Collection “Fiery Mansion” (860172)
Prima Little Boo Rub Ons (860226)
DMD Inc, Paper Reflections 5 x 7 Card (6 09636 01200 7)
Bo-bunny Rub Ons

Boo Card
Prima Little Boo Collection “Night Owl” (860202)
Prima Little Boo Collection “Spooky” (860165)
Prima Esprit Black (518424)
Prima Mixed Fancies Purple (518585)
Prima Say it in crystals (517915)
DMD, Inc Paper Reflections 5 x 7 Card (6 09636 01200 7)
Supplies Used:
Bo-bunny Concord Dot (12CDD677)
Bo-bunny Spooktastic Haunted (12SHH550)
Bo-bunny Spooktastic Stripe (12SSS74)
Bo-bunny All Dressed UP Cardstock Stickers I10ADCS666)
Bo-bunny WR Clover Double Dot Ribbon (WRCL065)
Creative Impressions Mini Spiral Clip

Supplies Used:
Bo-bunny Journal Acrylic Stamp (SSJ512)
Bo-bunny Spooktastic Friends (12SP543)
Bo-bunny Spooktastic Stripe (12SS574)
Bo-bunny Spooktastic Cutout Tag 12(STC680)
Bo-bunny Double Dot Ribbon
Bazzill Library Pocket
StazOn Opaque Cotton White Ink
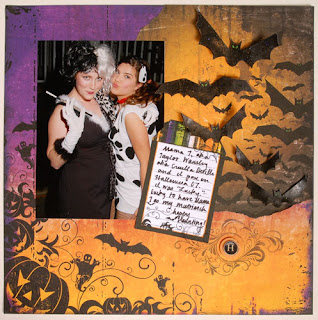
Supplies Used:
Prima Little Boo Collection “Spooky” (860165)
Prima Little Boo Collection “Eerie Apparition” (860219)
Prima Say it in crystals (517311)
Prima Halloween Rub-ons
Prima Purple Cardstock
Black Cardstock
Color Box Charcoal Chalk
Black Diamond Stickles

October 29, 2008

Too Cute to Spook!!!


This is a quick and easy way to scrapbook your Halloween photos. The Bo-bunny Spooktastic Cutout sheet is cut up for the album pages, the Bind-it-all to punch and the 5/8” black wire to create this little album. Tie a little ribbon and you are done. I added a ghost rub-on to a clear transparency, trimmed around it and tied it on the spine. Create this as a party favor, only takes one sheet of cutouts to make the entire album!

Technique: Place ghost rub-on a transparency, trim and tie on spine. Gives the illusion that it’s floating on book.


Supplies Used:
Bo-bunny Spooktastic Stripe (12SS574) and Spooktastic Friends (12SP543)
Bo-bunny12” Spooktastic Cutout (12STC680)
Bo-bunny Moster Mash Rub-ons (RBM831)
Bo-bunny Double Dot Ribbon
Zutter 5/8” Black Wires (2652)
Close to my Heart Black Sheer Ribbon (Z117)
Prima Black Tie Collection (518271)
Prima Transparencies (880996)
May Arts Green Ric Rac Ribbon
On the Surface Black Magic Fiber (MAT125)

October 26, 2008

Boo to you!

Okay this is a fun tradition and I never even thought of how it could spread on the blog. Julia Sandvoss who is the head of our design team just did a fun post on the Bo Bunny blog at http://bobunny.blogspot.com/

The Bo-bunny Blog Post...

If you're not familiar with this...it a cute Halloween tradition. It involves...a Ghost, like you see here, that is given, along with a note or poem...and the best part a treat. Then you take those...place them at a neighbor's or friends door, ring the bell and run. The recipient then posts the Ghost on their window so others know they've been BOOed and now it's their turn to do the same for someone else. It's simply fun...and such a good feeling to do something special for others. We started doing this a few years ago. And I have to say..it was very fun to have someone BOO us!

So...how can you get BOOed? Well as much as I'd like to leave candy and treats at your door many of us are far apart, (we have readers from South Africa and Norway and China )...the BOO will work through the Blog network.

Here's how to join us:

We'd like to ask for those that have a blog, that you add the Bo Bunny Blog to your Favorite Links. If you've already done this..that's fine too. I've been visiting your blogs and would like to see you sharing and spreading the word about our Blog.

Simply add our link to your blog links. Then pop back here and post a comment leaving a link to your blog. You have until next Thursday, October 30th at Midnight PST.

Then come Halloween, I'll visit those links to your blog...and some lucky people will receive a BOO from me! If you do...you'll receive some oh so fun Bo Bunny goodies to enjoy for a yummy way to celebrate Halloween. And maybe a bit heathier than all those Twix and Kit Kats!!LOL

And last for those loyal readers of ours that do not have a blog to participate...leave me a comment with a favorite Halloween tradition or even your favorite candy..or a simple BOO will do!!

BOO to YOU!!!

October 25, 2008

Free Online Scrapbooking Magazine

Have you heard about Scrapbooking.com, a free online scrapbook magazine? I don't think scrapbooking has to be an expensive hobby, take advantage of this free publications for scrapbook ideas. Here's the link if you are interested in looking at it,

http://scrapbooking.com/cgi-bin/Phase_2/cover.pl

If you decide to subscribe to this free magazine, please put my name in the referal box. This is their annual Refer-a-Friend time. If you haven't heard about this contest, all one has to do is forward the weekly newlsetter to friends. If they sign up and tell them you referred them, they will put your name on the list and randomly rewared several subscribers with the latest craft products.

Many of you know me, I love to enter contests. This one is easy, promoting a free electronic magazine.

Hope you enjoy it!

October 18, 2008

Field Trip

In the evenings, I take art classes at the local community college. This week, the teacher took us on a field trip to the Mint Museum of Craft + Design. It was college night, offering a free tour of the museum along with food, live music, and a brooch making activity. Wow, an evening of inspiration and an opportunity to get to know others in the class on a personal level. I left that evening with a fresh new look on art, new friends and not to mention this cute little pin. Thank you Elizabeth for a break from our regular classroom routine!

October 10, 2008

Spooktastic Month

It’s the month of October and the store displays are filled with costumes and supplies for upcoming Halloween festivities. This sets the mood and is my inspiration for the following project.


Halloween Layout Supplies: Bo-bunny Journal Acrylic StampBo-bunny Spooktastic Haunted PaperBo-bunny Spooktastic Batty PaperBo-bunny Spooktastic Cutout TagBo-bunny ButtonBo-bunny has a Spooktastic Line of papers, cardstock stickers and cutouts.

The Spooktastic Haunted paper emphasizes bats and flourish swirls throughout. I choose a stamp that will enhance the overall design in your pattern paper as this flourish journaling acrylic stamp by Bo-bunny. Tear the bats from the Bo-bunny Batty paper and adhere to the Haunted paper. Add photo and journaling tag to layout. Cut out bats from one sheet of Batty Paper, rub stickles on the bats and adhere with 3-dimensional foam to give the illusion that they are in flight. Apply the masking technique with the swirl journaling stamp to the layout. Apply a button and sticker embellishment to the center of the stamped image.

What’s masking? It isn’t just costuming that hides your face but also a stamp technique. Masking allows you to manipulate a stamped image, creating a unique, one-of-a-kind result for your projects. Once you’ve mastered simple masking, you can utilize this technique with multiple stamps to create a layered effect, but first, let’s start with the basics …


(1) First, stamp image on a piece of scrap paper.
(2) Cut around the area that will be your mask; in this case, it is the journaling lines.(3) Place the mask on your layout or card stock project.
(4) Carefully line up the stamp over the mask area and stamp the image with an even pressure. With the Bo-bunny clear acrylic stamps, this technique is even easier since you can effortlessly line up your image.

(5) Remove the stamp and mask to see the final image.
(6) Stamp the journaling tag to unify the theme; repetition of the stamp helps coordinate the layout!


Masking Tips
  • To ensure that the mask stays in place, use a temporary adhesive on the back of the image or stamp image on a Post-It® note.

  • It takes time and patience to cut out some mask images, save the pieces in your stamp and store cases along with your stamps so they are available to use again.


  • Practice a few times on scrap paper until you feel comfortable with this technique.


  • For a more complicated, layered effect, try masking with multiple stamps. Although this requires more forethought and practice, the results are well worth the effort. Remember, with Bo-bunny stamps, the possibilities are endless!
I hope you enjoyed this project and will apply the masking technique to your projects this month. Please check out http://www.bobunny.com/ for more ideas and inspiration!